Greetings to all you lovely frock-alongers….. strap yourselves in because this pattern gets wild straight up.
I would like to add a disclaimer right now – this post is image heavy, and today I am covering how (and why) to move your pleats and how to draft and add pockets into the side seam of your dress. If you don’t want to do either of these things, come back tomorrow for some other pocket variations. I have a million ideas for this dress and not enough hours in the day or space in this post to cover them all.
If anything doesn’t make sense, if my steps go too fast, please let me know and I’ll try to add some more detail.
First up, let’s meet my original Dottie Angel Frock…. and my bust.
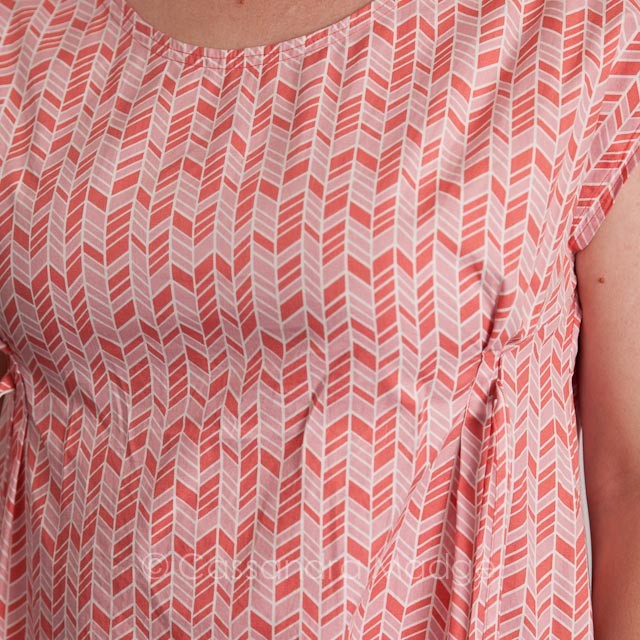
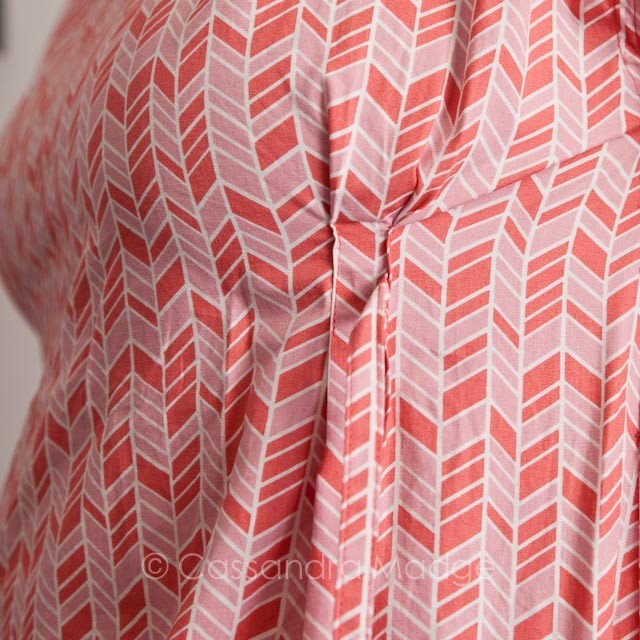
I have a 40″ bustline, and I cut a Medium size pattern. Going on advice from people that had already made this dress, I lowered my pleats by 1″. You can see here that wasn’t enough, as the gathers are stretched across my lower bust and not in a very flattering spot. Please also notice the awkward position of the tie and the pleat seam – the pattern has you press the pleats towards the back, which is against the standard for pressing vertical darts/pleats. With the tie in the final seam that means that it pulls your topstitching backwards and you lose that lovely neat effect. If you are happy with following the pattern, please do so. I did it the opposite way for my second dress and the tie sits so much nicer. Let’s get started!
Pleat position and tie creation
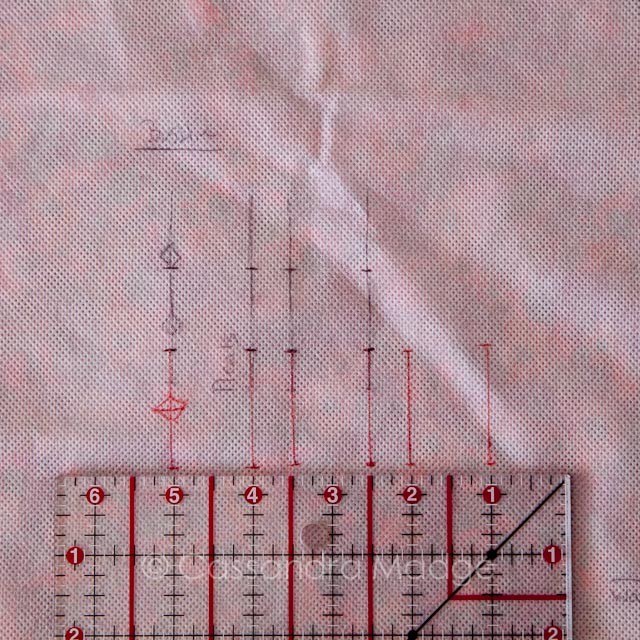
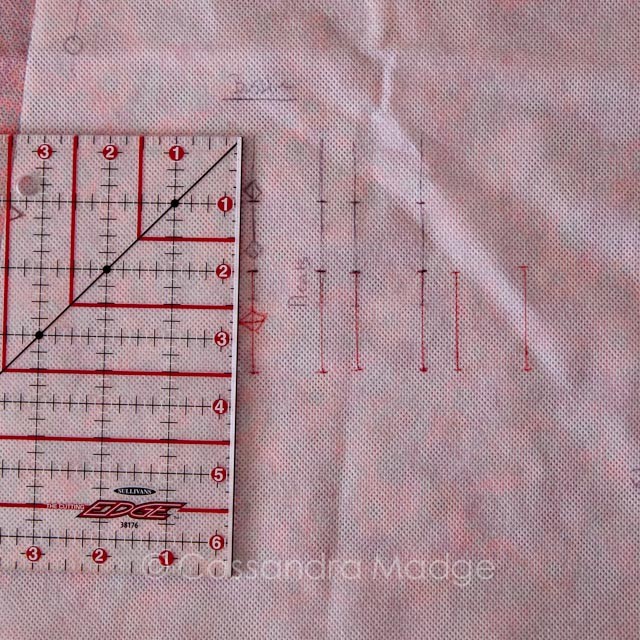
I’m a pattern tracer. So all the pattern pieces you see here I traced off my original pattern which leaves that intact in case I change my size etc. On my pattern you can see the original lines in black at the top, with the diamond marking the tie position. The second diamond down shows the position I used for my first frock, and the red lines at the bottom show the pleat position for my second dress. It is extremely easy to adjust or move these pleats using a ruler – I measured down 2 inches from the top, and then copied the dimensions and spacing of the original lines. I also chose to add a third pleat in as I had too much fullness in the middle of my original dress. Again, I simply copied the lines from the first two pleats over.
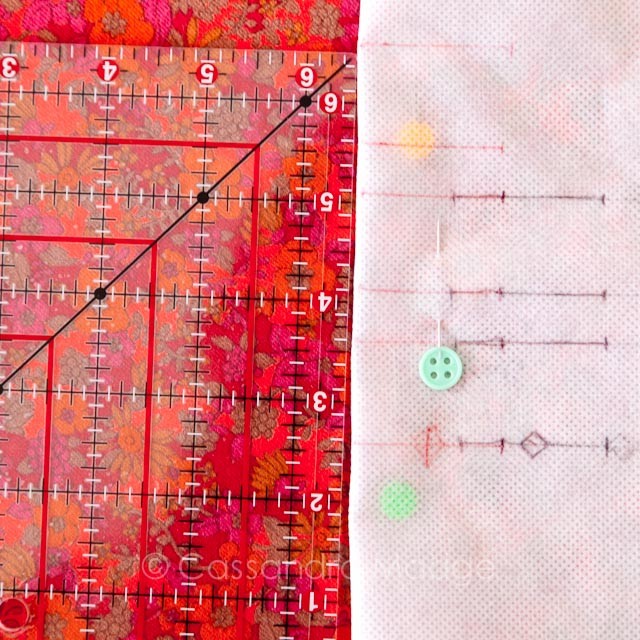
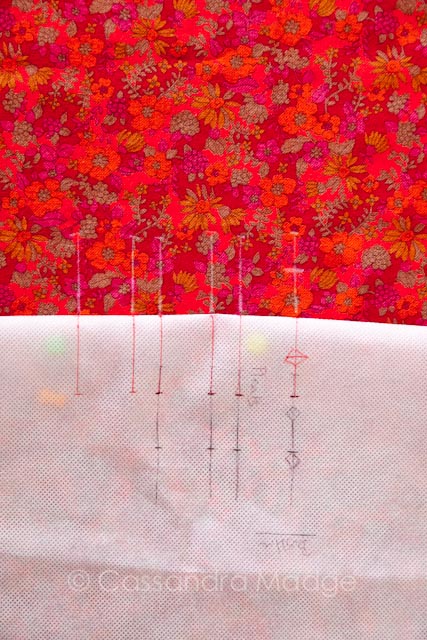
To transfer the markings to my dress, I simply pinned the pattern just below the pleats and folded it back along the bottom edge of the pleat markings. Then I used my ruler to measure up the length of the markings and draw straight lines across. The little “T” marks at each end are really valuable for when you sew the pleats up. Don’t forget to mark the centre of the first line so you have a position for your tie.
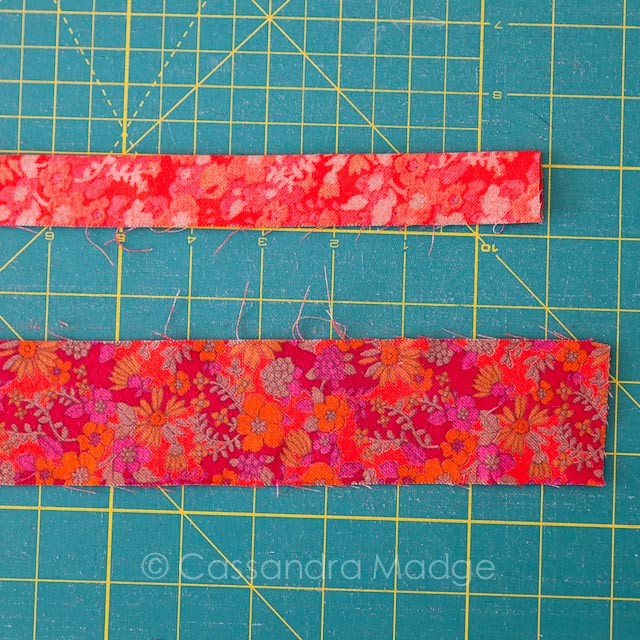
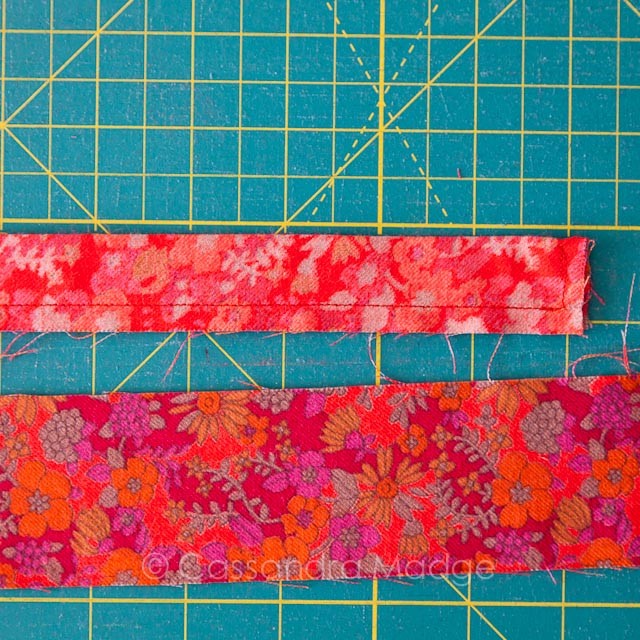
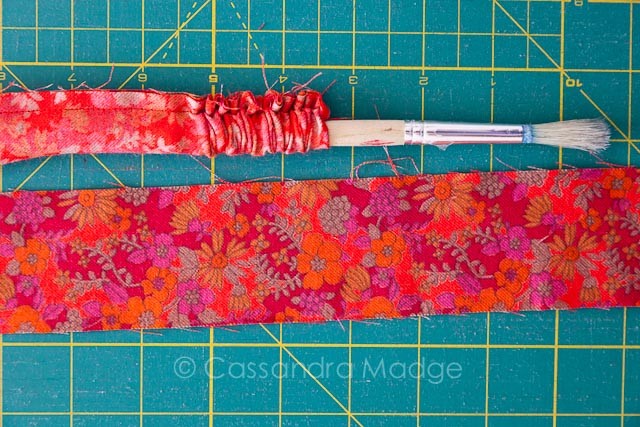
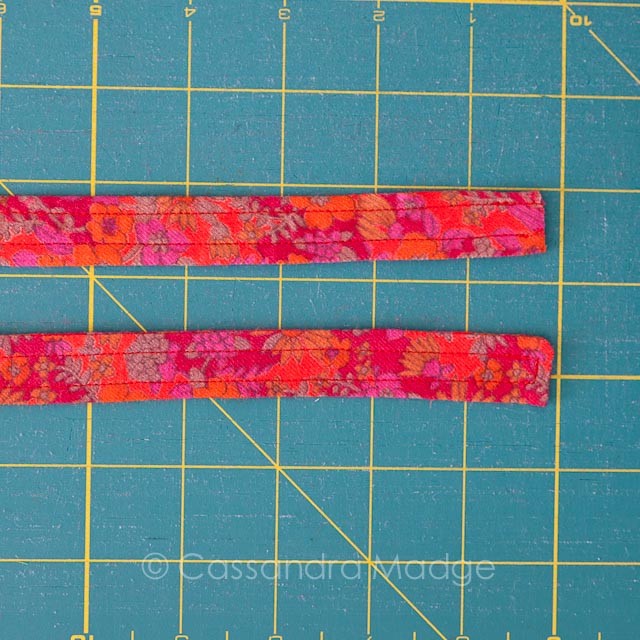
The pattern instructions for the tie are very straightforward, so I won’t go through them. For style reasons I wanted the ties for this dress to be a little thicker, so I cut my ties at 2″ wide, and slightly shorter than the pattern calls for, approx 31″. It’s much easier to cut it out with a long ruler and rotary cutter than trying to use the pattern. To make easy turn ties, press your fabric in half, right sides together (1st picture), then sew down the long side and across ONE end only using a 1/4″ seam allowance (2nd picture). Using a blunt point, such as the wrong end of a knitting needle or here, the handle of a paintbrush, start at the sewn end and push inwards, turning the tube inside itself. Keep pushing and wriggling until the entire tube is turned right way out. (3rd picture). Finally, roll the seam to the side edge of the tie, press well and top stitch down one long side, across the closed end, and up the other side. There is no need to close the other end as this will be covered by the pleat in the dress (4th picture).
Instructions on how to draft pockets and mark the dress pattern.
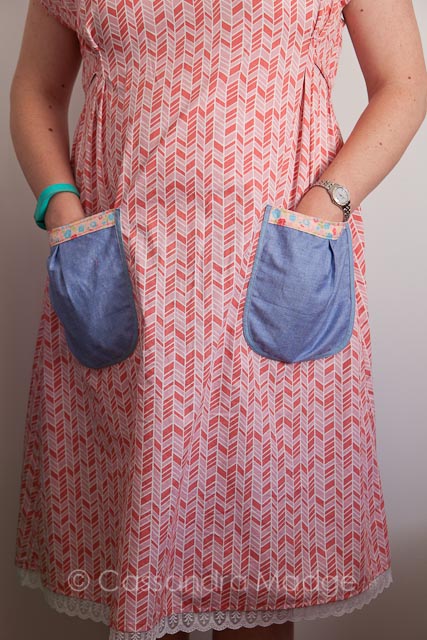
I used my original dress to estimate the position that I would like my pockets to be.
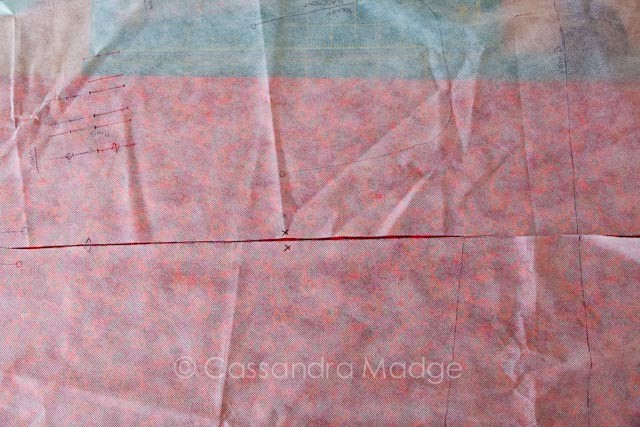
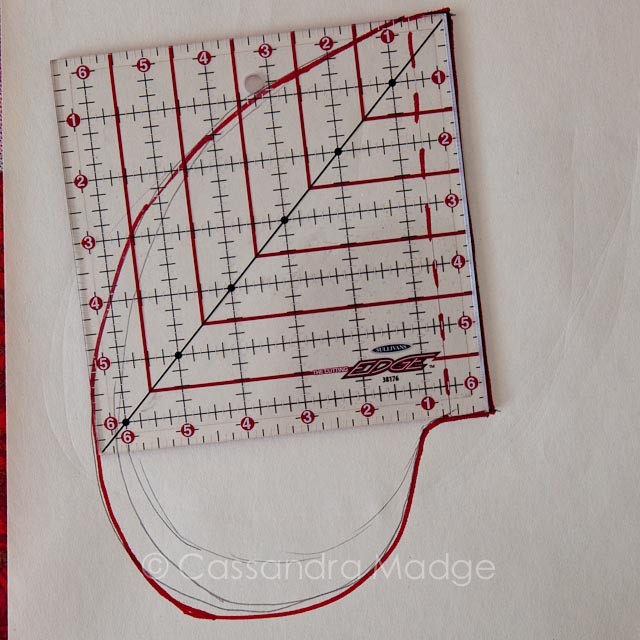
Drafting in-seam pockets is much easier than it sounds. For the basic steps and how I came to the pattern above, please check out the following tutorial on the Burda website – Make a pattern for In-seam pockets. I followed their sizing but if I was making it again I would either cut my pattern a little bigger or use a smaller seam allowance on the pocket itself as it’s just a tiny bit snug.
You can see in the first picture I marked where the top of the patch pocket was level with on the side seam (x). You need to mark this placement on the front AND back pieces. Make sure it is the same by double checking alignment of the other markings on the side seam – the armhole dot, the notch below that and the bottom hem line are all matched up here, so I know the pockets should match up too.
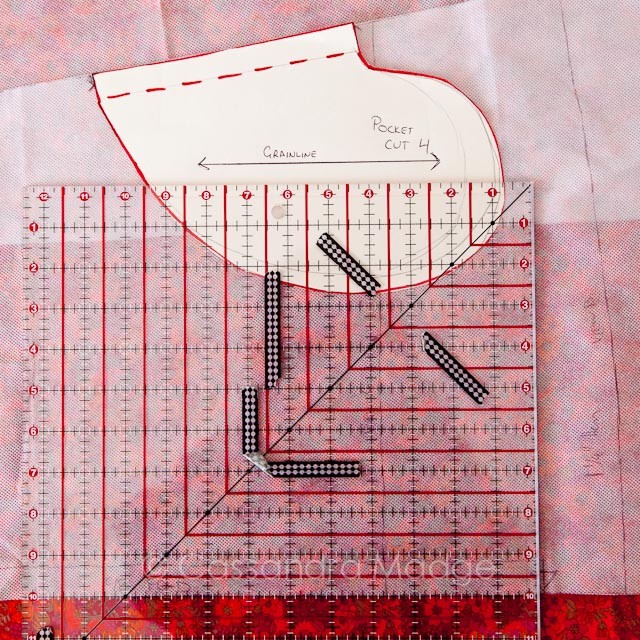
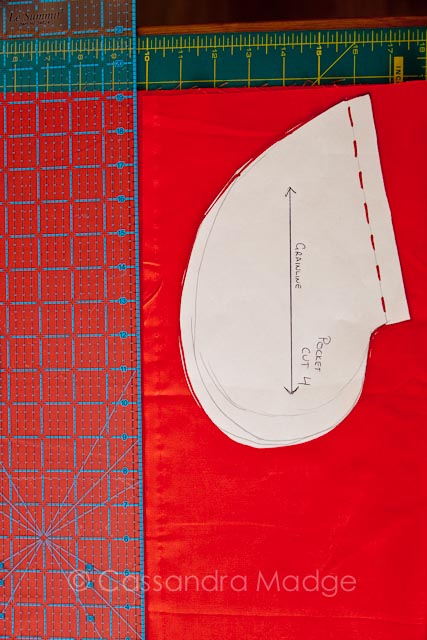
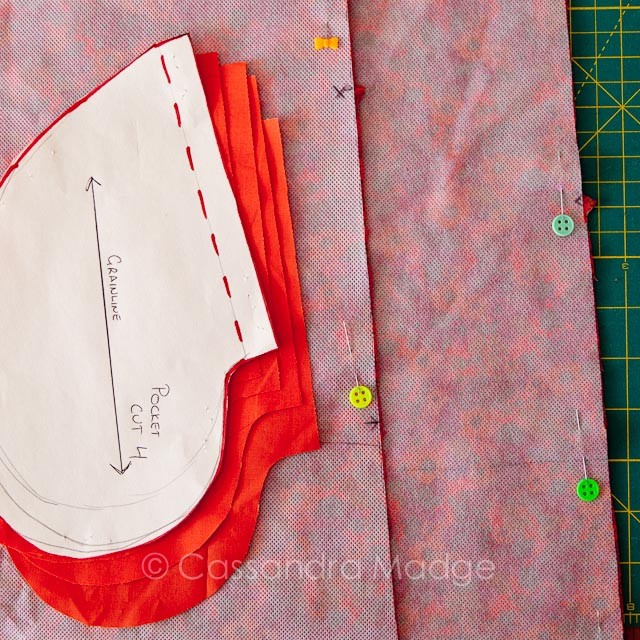
I drafted my pocket opening to have the same slope as the side seam of the dress, which means it needed a separate grainline to be marked. It’s easy to mark this by aligning your pocket piece with the side seam and then using a large ruler to mark a line parallel to the grain line (shown on this pattern by the centre back foldline) onto the pocket. Using that grainline, cut 4 pocket pieces (2 pairs) from your fabric – I was short on the floral so I used a nice bright quilting cotton for a bit of pop. You can see in the final picture that I also marked the bottom of where the pocket came with a little notch.
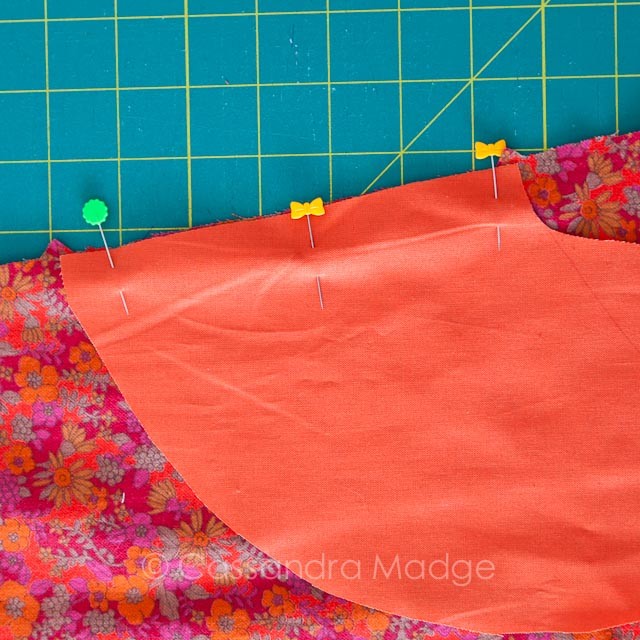
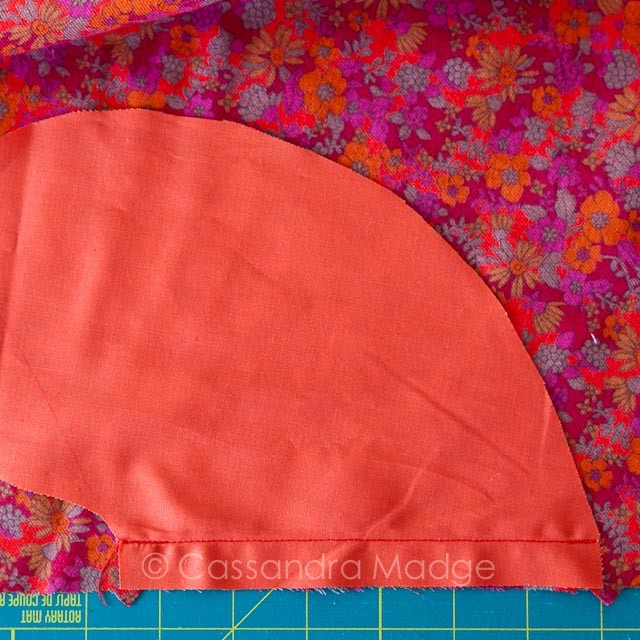
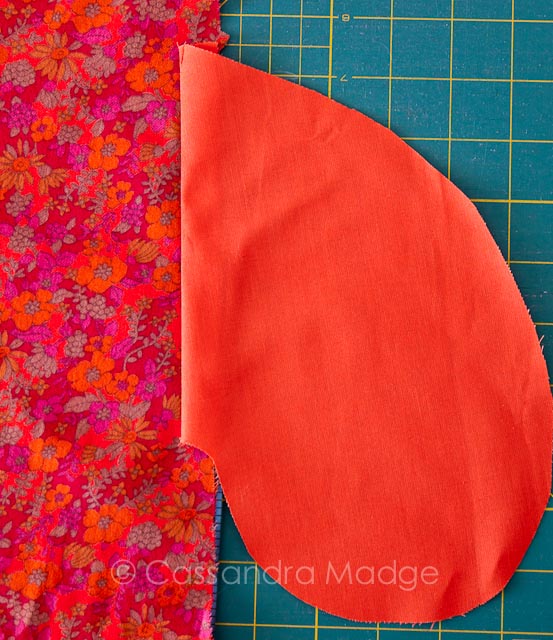
Pin one of your pocket pieces along each side seam, matching notches, raw edges together and RIGHT SIDES TOGETHER if your fabric has a right and wrong side. Make sure your pin your pockets pointing down and not up 😉 Sew just this seam at a fraction under 5/8″ (1.5cm). Press the pocket out and away from the dress. Repeat for all 4 pocket pieces, two on the front, two on the back. Now we leave the pockets until the side seams of the dress are sewn.
Stitching the pleats and tie in place
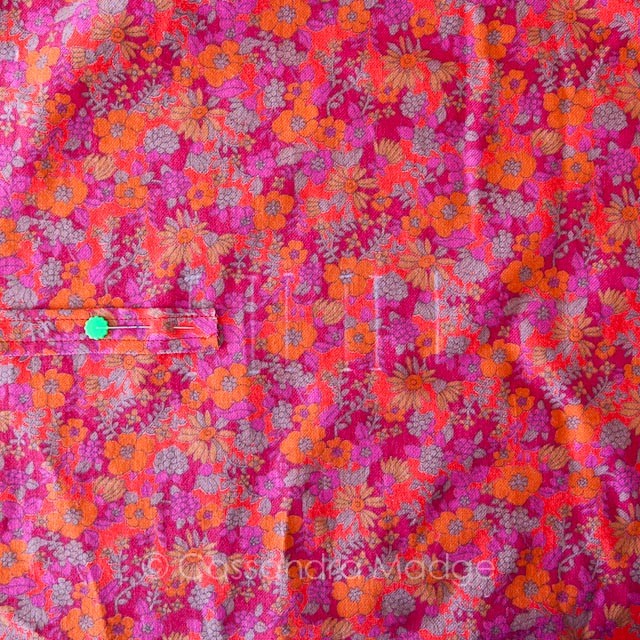
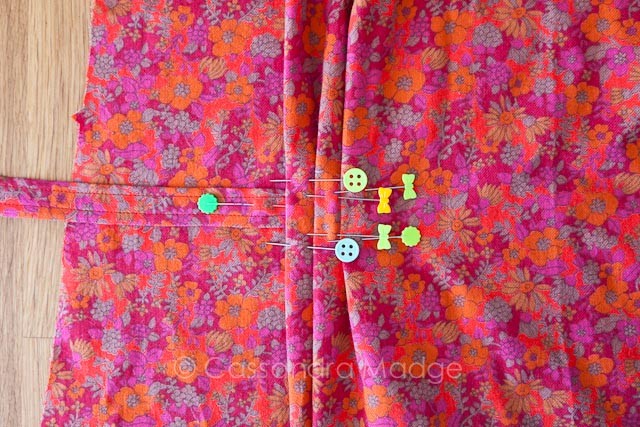
Now it’s time to stitch up the pleats on the front piece. I pin my tie in place over the centre tie mark on the first pleat, then fold the pleats together so the lines that I drew in meet each other. I place a couple of pins in each pleat to hold them in place. Here I have folded my pleats opposite to how the pattern suggests, but a way that makes more logical sense for me given that we are topstitching over the tie.
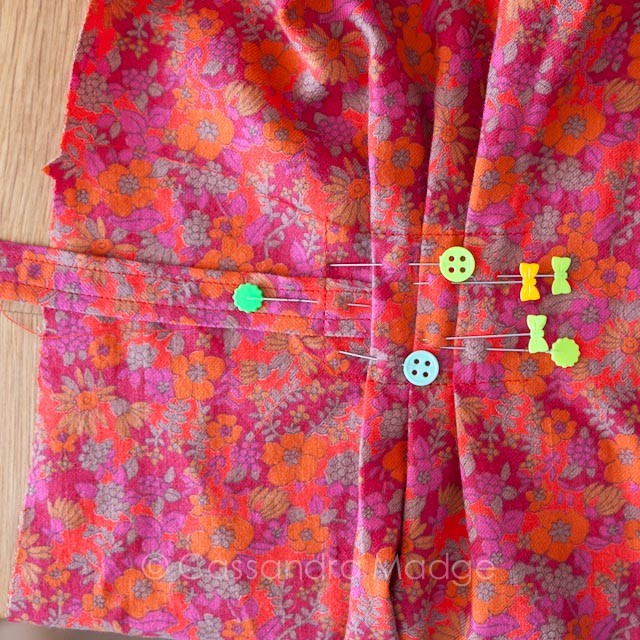
Rather than basting each individual pleat I leave the pins in place and carefully baste three sides of the pleats – from the centre across the top, down over the tie, and then back across the bottom.
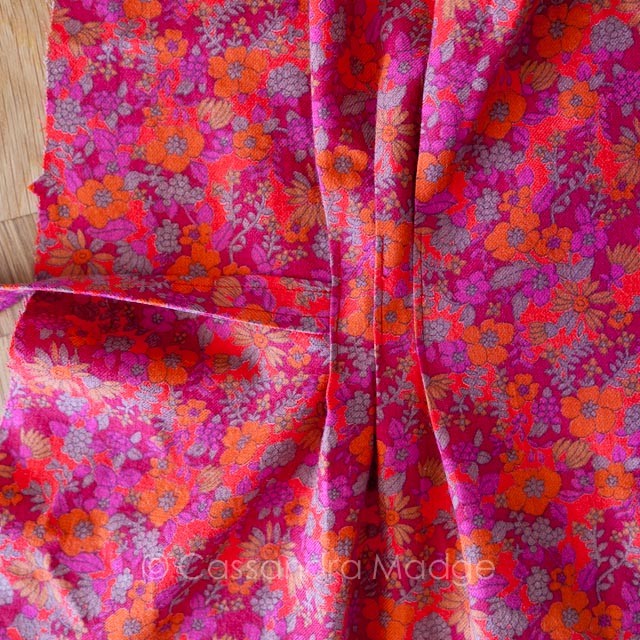
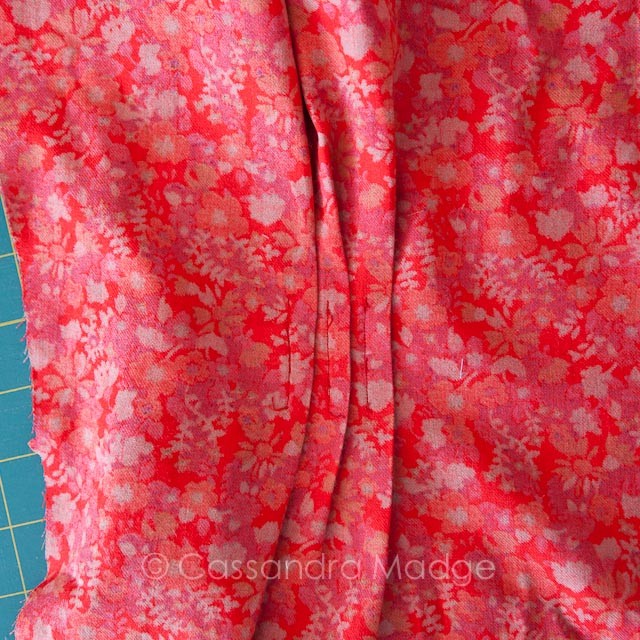
Here I have top stitched down each pleat – including some backstitching over the tie on the first pleat for extra strength. I stitched each pleat one by one, only taking out the pins as I came to them. You can see how the tie falls naturally away from the topstitching instead of folding it back on itself. This fabric is nice and flowy, so I don’t want stiff heavy pressed in pleats so I have given it a very light press to hold the creases. Also shown is the wrong side.
FAST FORWARD……. the next step is to be completed after the shoulders, neck and armhole binding.
Sewing the side seams and pockets together.
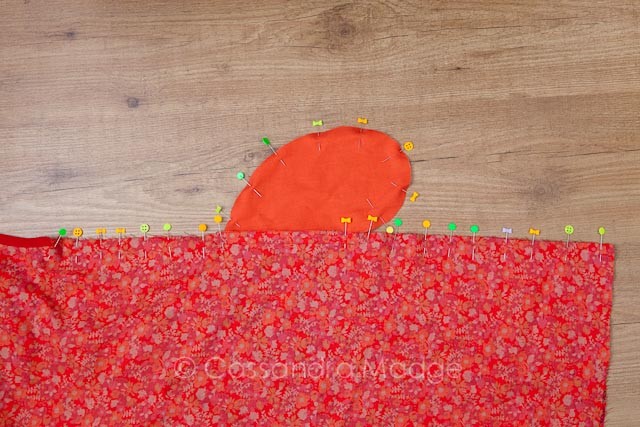
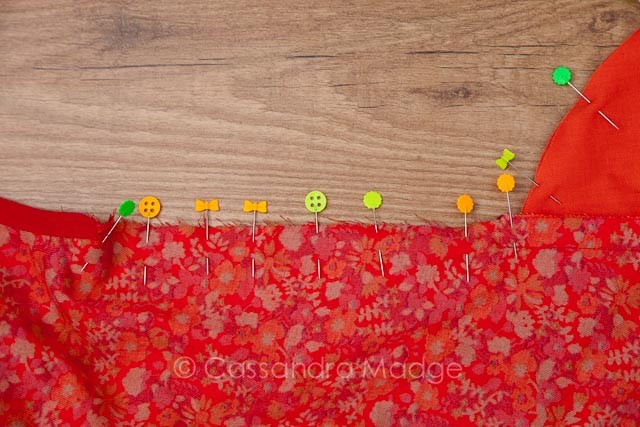
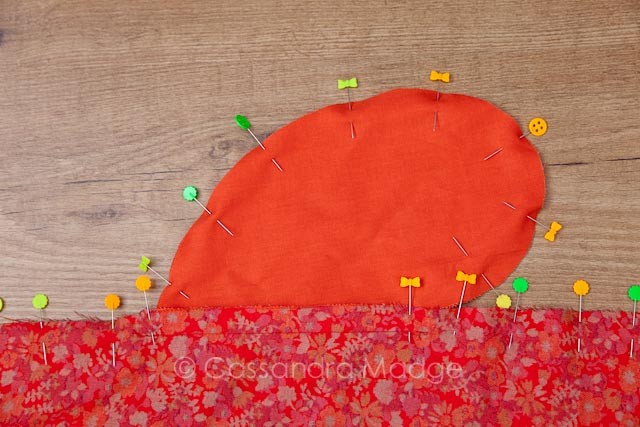
Pin your side seams together – front piece to back piece, right sides together – starting at the armhole and moving down. Match the notches and line up the pocket pieces, front and back, pinning around the outside of the curve, back into the side seam and down to the hem. It’s worth taking some time to do this step and it gives a much better result! All these edges are bias and are prone to stretching out of shape, hence why I used so many pins.
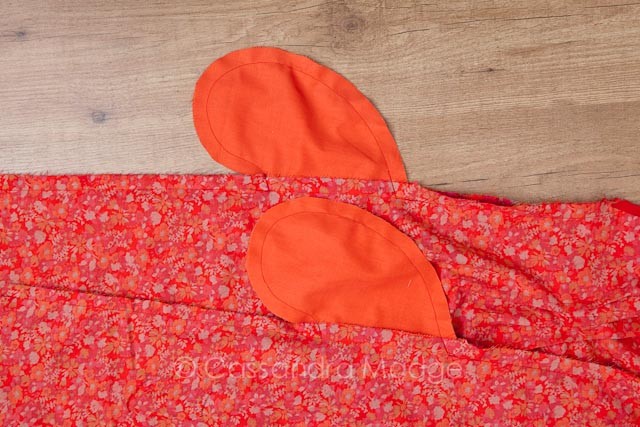
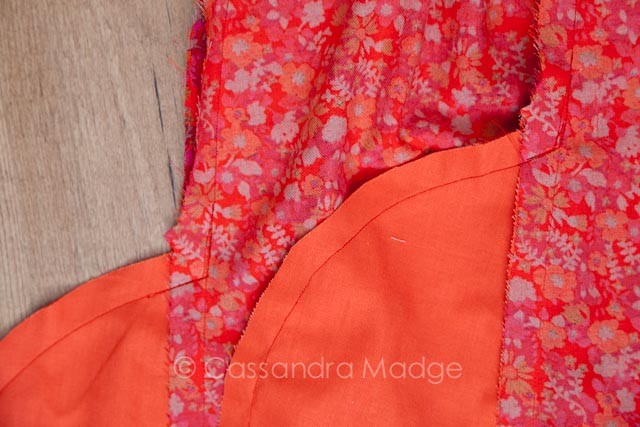
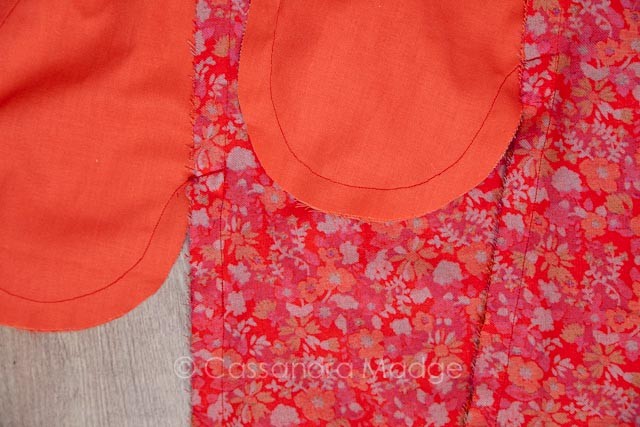
Stitch in exactly the same manner, always from the armhole down, never from the hem up. When you come to the pocket seam line, stitch just inside of it until you are a seam allowances width inside the edge of the pocket line. Drop your needle, pivot your fabric and then sew the curve around the pocket up until you get back onto the dress fabric again. Make sure you are catching the seam allowance on the bottom piece of fabric (ask me how I know that one!). Stitch just past the pocket seam, drop your needle and again pivot the fabric, and continue to sew the seam down to the hem of your garment.
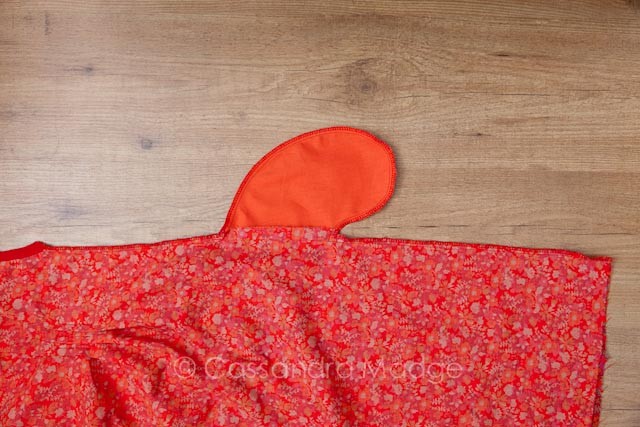
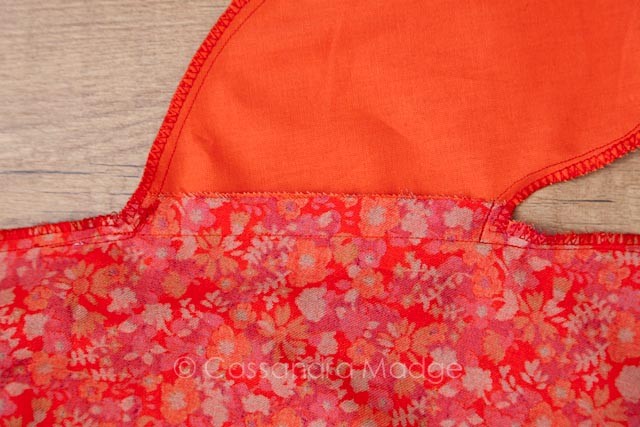
At this point I should have notched my seam allowance above and below the pocket. This allows you to press the dress fabric seam open if you prefer. However I chose to use an overcasting stitch on my sewing machine to stitch the edges all the way around, as the fabric is very soft and prone to fraying. If you would like to see this again in a different format, there is a tutorial for sewing in-seam pockets HERE on the Burda website.
This process is different to the pattern instructions, which are given to make a beautiful french seam. I am not sure how to incorporate a pocket piece into a french seam, so this will work for me. As long as the edges are secure from fraying, the finished dress will be durable.
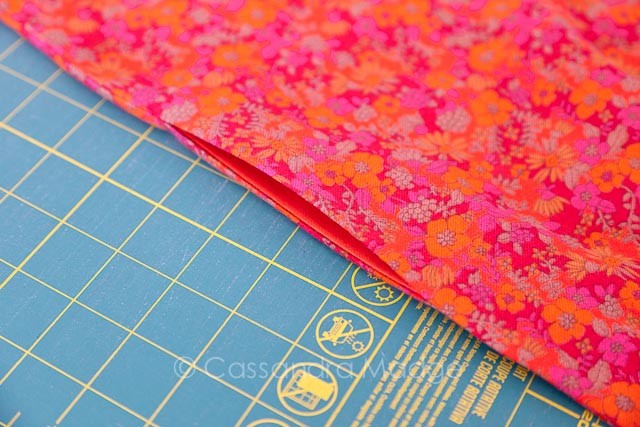
Finally, give your side seam a good press, including a crisp edge along that pocket piece, stand back and admire your beautiful pockets!!
After that pocket marathon I’m sure we are all exhausted! I’ll be back tomorrow with some more ideas for pockets, but until then make sure you let me know how you are going with your frocks!

Please be aware that there may be affiliate links in this content. Your support allows me to keep creating for you!



Lynn B
Thank you for taking the time to do this. I have yet to get started but I always love to read and read all the tips I can before I get started. I have my pattern and fabric ready though. Love the Side seam pockets.
Cassandra
Hi Lynn, thanks so much for commenting! I am the same as you, trying to get lots of information before I take the plunge. Make sure you share your finished frock with us!
Nicky
Thanks Cassie – great post – hope to make a start today. Great info on lowering the pleats. Love your pocket idea but looking forward to using some of my stash on some of those cute original pockets
Cassandra
Thanks so much for your comment Nicky. I’m excited to see all the different variations that everyone comes up with!
April S
Thanks for the great options and the reminder to adjust pleats! Planning on cutting out tomorrow
Cassandra
April, you are so welcome! Make sure you keep showing us your progress 🙂
Peggy
Thank you so much for posting you’re ideas and problem solving on this pattern. I just bought it and have read everything I can find. I really enjoy the pocket tutorial.
A Lynn
I’m making this in 2022 and your instructions are SO helpful!
Cassandra
I’m so glad you are still finding these helpful. If you ever have any questions, I am always willing to give it a go helping people figure out the tricky bits!
Jill
Thanks for posting. In 2024 I am currently at the pleat stage of the Dottie dress when I came over this post! Wow what a coincidence. So it will be super helpful to me to look at your methods, I have already lowered the pleats due to my size but the adding of a third one is great.
Keep up the good work! Thanks.
Pat
Thank you so much for the tips on altering pattern. I am so excited I finally found the pattern. It was at a Walmart in fla. The pattern cabinet was a total mess. I went thru every pattern . Found it in bottom drawer where the ” I don’t want to put it back where it belongs” thing we’re. Was so excited am sure it was the highlight of the security tape. But then again more people might do the happy dance